
Craving homemade pie with a crust that’s both tender and flaky? This easy pie crust recipe is crafted for beginners and seasoned bakers alike! Discover the secrets to achieving bakery-level results—using simple pantry staples and foolproof techniques—while addressing the gaps often found in traditional pie crust guides.
Why This Pie Crust Works
Combining cold butter and shortening yields a delicate, flaky texture and rich flavor. Our step-by-step guide eliminates common pitfalls and provides smart shortcuts, so you can master pie dough quickly—even if you’ve struggled with other methods!
Looking for a creative twist? Try our equally simple pretzel pie crust for salty and sweet pies.
Ingredients List Pie Crust
- 2 ¾ cups (350 grams) all-purpose flour
- ½ teaspoon fine sea salt
- 1–2 tablespoons granulated sugar (optional for sweet pies)
- ½ cup unsalted butter, chilled and cubed
- ⅔ cup vegetable shortening, well chilled
- 1 tablespoon vinegar
- ½ cup ice-cold water, divided
Step-by-Step: How to Make Pie Dough
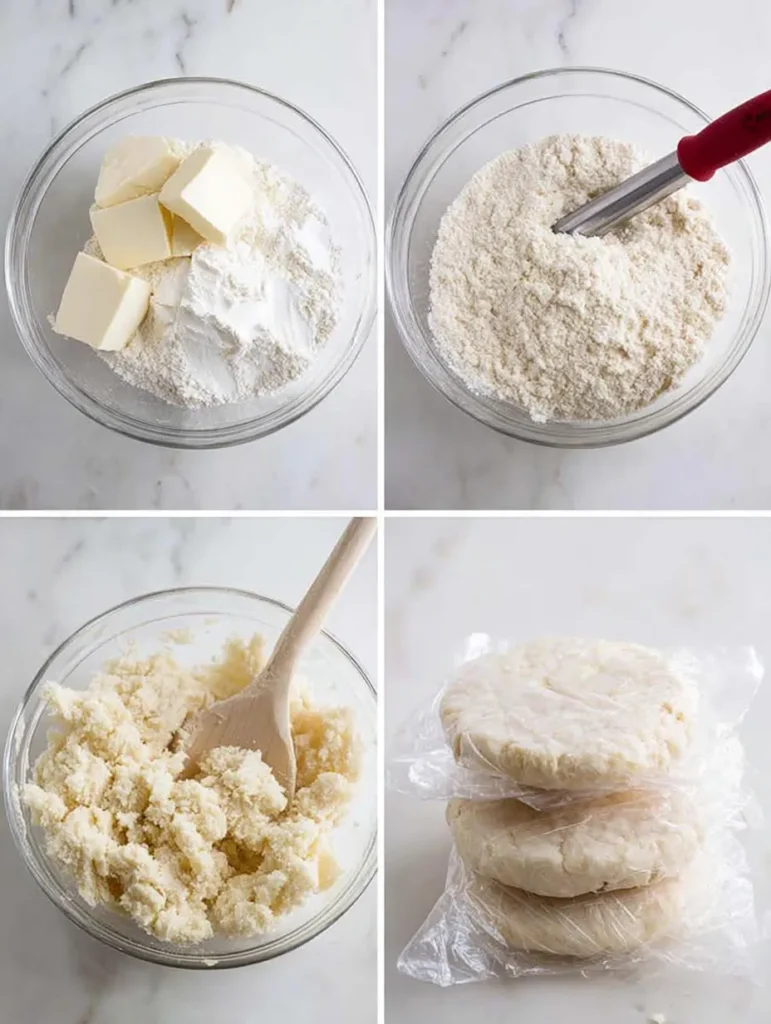
1. Mix Dry Ingredients
In a large bowl, whisk together flour, salt, and sugar.
2. Cut in the Fats
Quickly work cold butter and shortening into the flour mix using a pastry cutter, fork, or even your hands, creating coarse crumbs. Fast mixing prevents melting and ensures texture.
3. Add Liquids
Mix vinegar and ¼ cup ice-cold water separately, then drizzle into the dry ingredients. Stir gently. Add more cold water as needed, one tablespoon at a time, until dough just comes together—don’t overmix!
4. Chill the Dough
Divide dough in half, shape into disks, cover tightly with plastic wrap, and refrigerate for at least 1 hour. This step ensures easier rolling and a flakier end result.
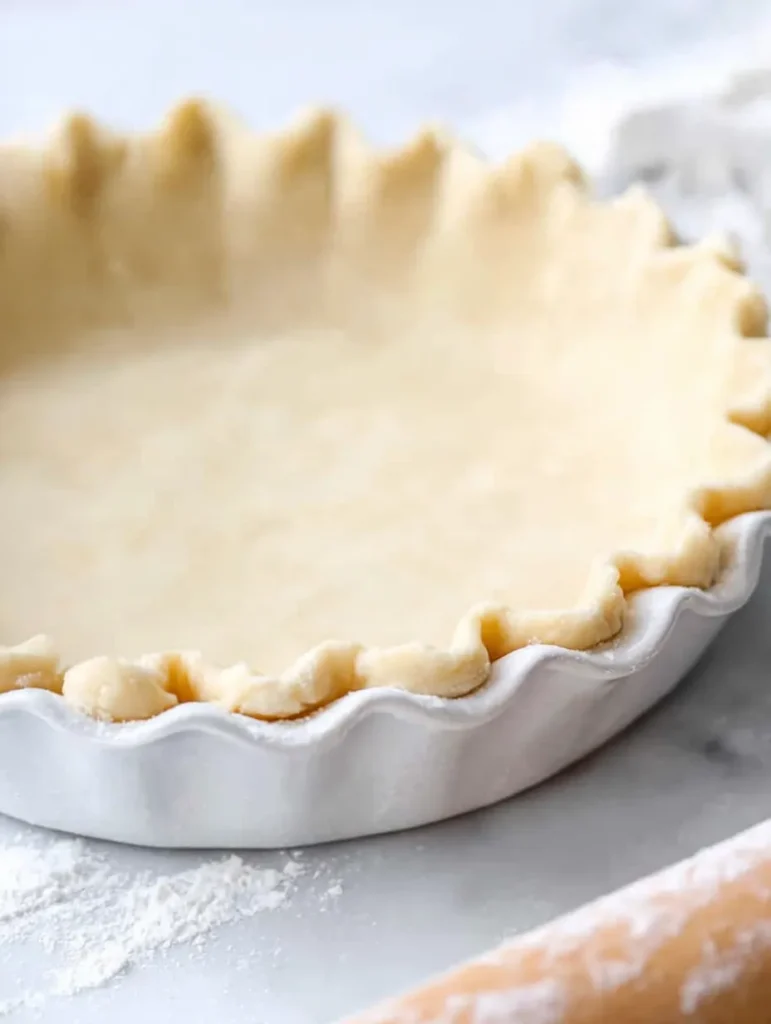
5. Roll Out & Transfer
On a floured surface, roll each disk to ⅛–¼ inch thickness. Gently fold into quarters to transfer to a pie dish, then unfold. Press edges for a fluted or forked pattern.
Blind Baking Method
For recipes that require pre-baked crust (think cream or custard pies), line with parchment and fill with pie weights or dried beans. Bake at 400°F (205°C) for 15 minutes, remove weights, and bake 10–15 minutes more until golden.
Pro Tips for Perfect Pies
- Keep all ingredients chilled. Work quickly!
- Repair cracks: Wet a finger and gently press dough together.
- Prevent shrinking: Chill formed crust in the pie pan before baking.
- Make it shine: Brush edges with an egg wash for a golden, glossy finish—learn exactly how in our egg wash guide.
- Freeze for later: Wrap dough disks airtight; freeze for up to 3 months.
Filling Ideas & Pie Pairings
This versatile crust suits sweet favorites like apple, cherry, or pumpkin pie, as well as savory classics like chicken pot pie. For a show-stopping dessert, consider making a lattice crust or experimenting with breakfast pies—just ensure your fillings are chilled or cooled before assembly.
Frequently Asked Questions
Can I use a food processor?
Yes, but go slow! Over-mixing leads to tough crusts.
Can I use only butter?
Absolutely—just increase chill time to maintain structure.
How do I avoid shrinkage?
Chill assembled crust before baking and use plenty of weights for blind baking.
What’s the best way to freeze dough?
Wrap each disk tightly and store in a freezer bag. Thaw overnight in the fridge.
With these clear steps and expert fixes, you’ll achieve a pie crust that’s light, crisp, and delicious—every time. Whether you’re crafting a classic double crust or an intricate lattice pie, don’t forget the power of an egg wash for bakery-worthy shine!
Ready to bake your best-ever homemade pie? Get creative and test out both the classic and pretzel variations for your next gathering. Happy baking!